Command Line Interface and Web Console
Now that we’ve dispensed with the basics, it’s time to start practical hands-on exploration of OpenShift. As we’ve already discussed and demonstrated, the two major methods for a user to interact with an OpenShift environment is through the Web Console or the oc cli.
Setup
Web Console
-
https://<~ the web console is secured with TLS -
console-openshift-console<~ "console" is the name of the workload and "openshift-console" is the name of the project in which it exists -
.apps<~ is the standard endpoint that allroutebased traffic is exposed -
."CLUSTER_NAME"<~ remember this for when you track multiple OpenShift environments -
."BASE_DOMAIN"<~ set at install time
curl https://console-openshift-console.apps."CLUSTER_NAME"."BASE_DOMAIN"/healthCommand Line Client
The oc cli requires a little more effort to setup, but nothing extraordinary.
You can find the appropriate CLI on a running cluster using the web console:
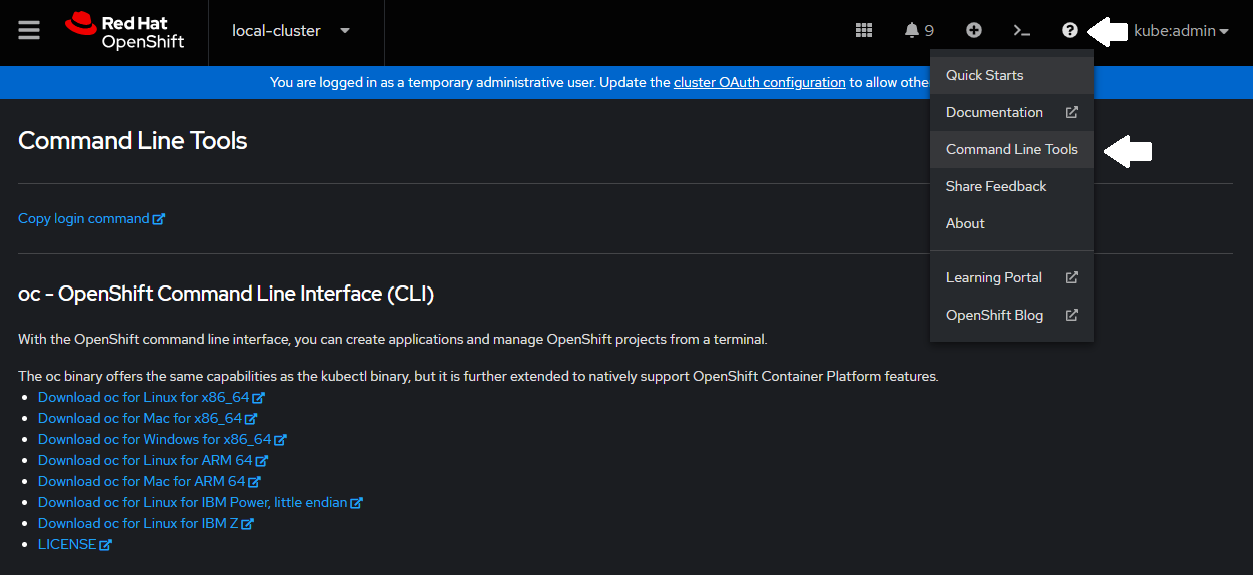
Or you can download with using well defined URL endpoints:
curl -L https://downloads-openshift-console.apps."CLUSTER_NAME"."BASE_DOMAIN"/"ARCHITECTURE"/"OPERATING_SYSTEM"/oc.tar | tar -xvf -curl -L https://mirror.openshift.com/pub/openshift-v4/"ARCHITECTURE"/clients/ocp/stable/openshift-client-linux-"RELEASE_VERSION".tar.gz | tar -zxvf -Locating Resources
Web Console
The design of the console is intuitive, but here are some of the primary areas of interest:
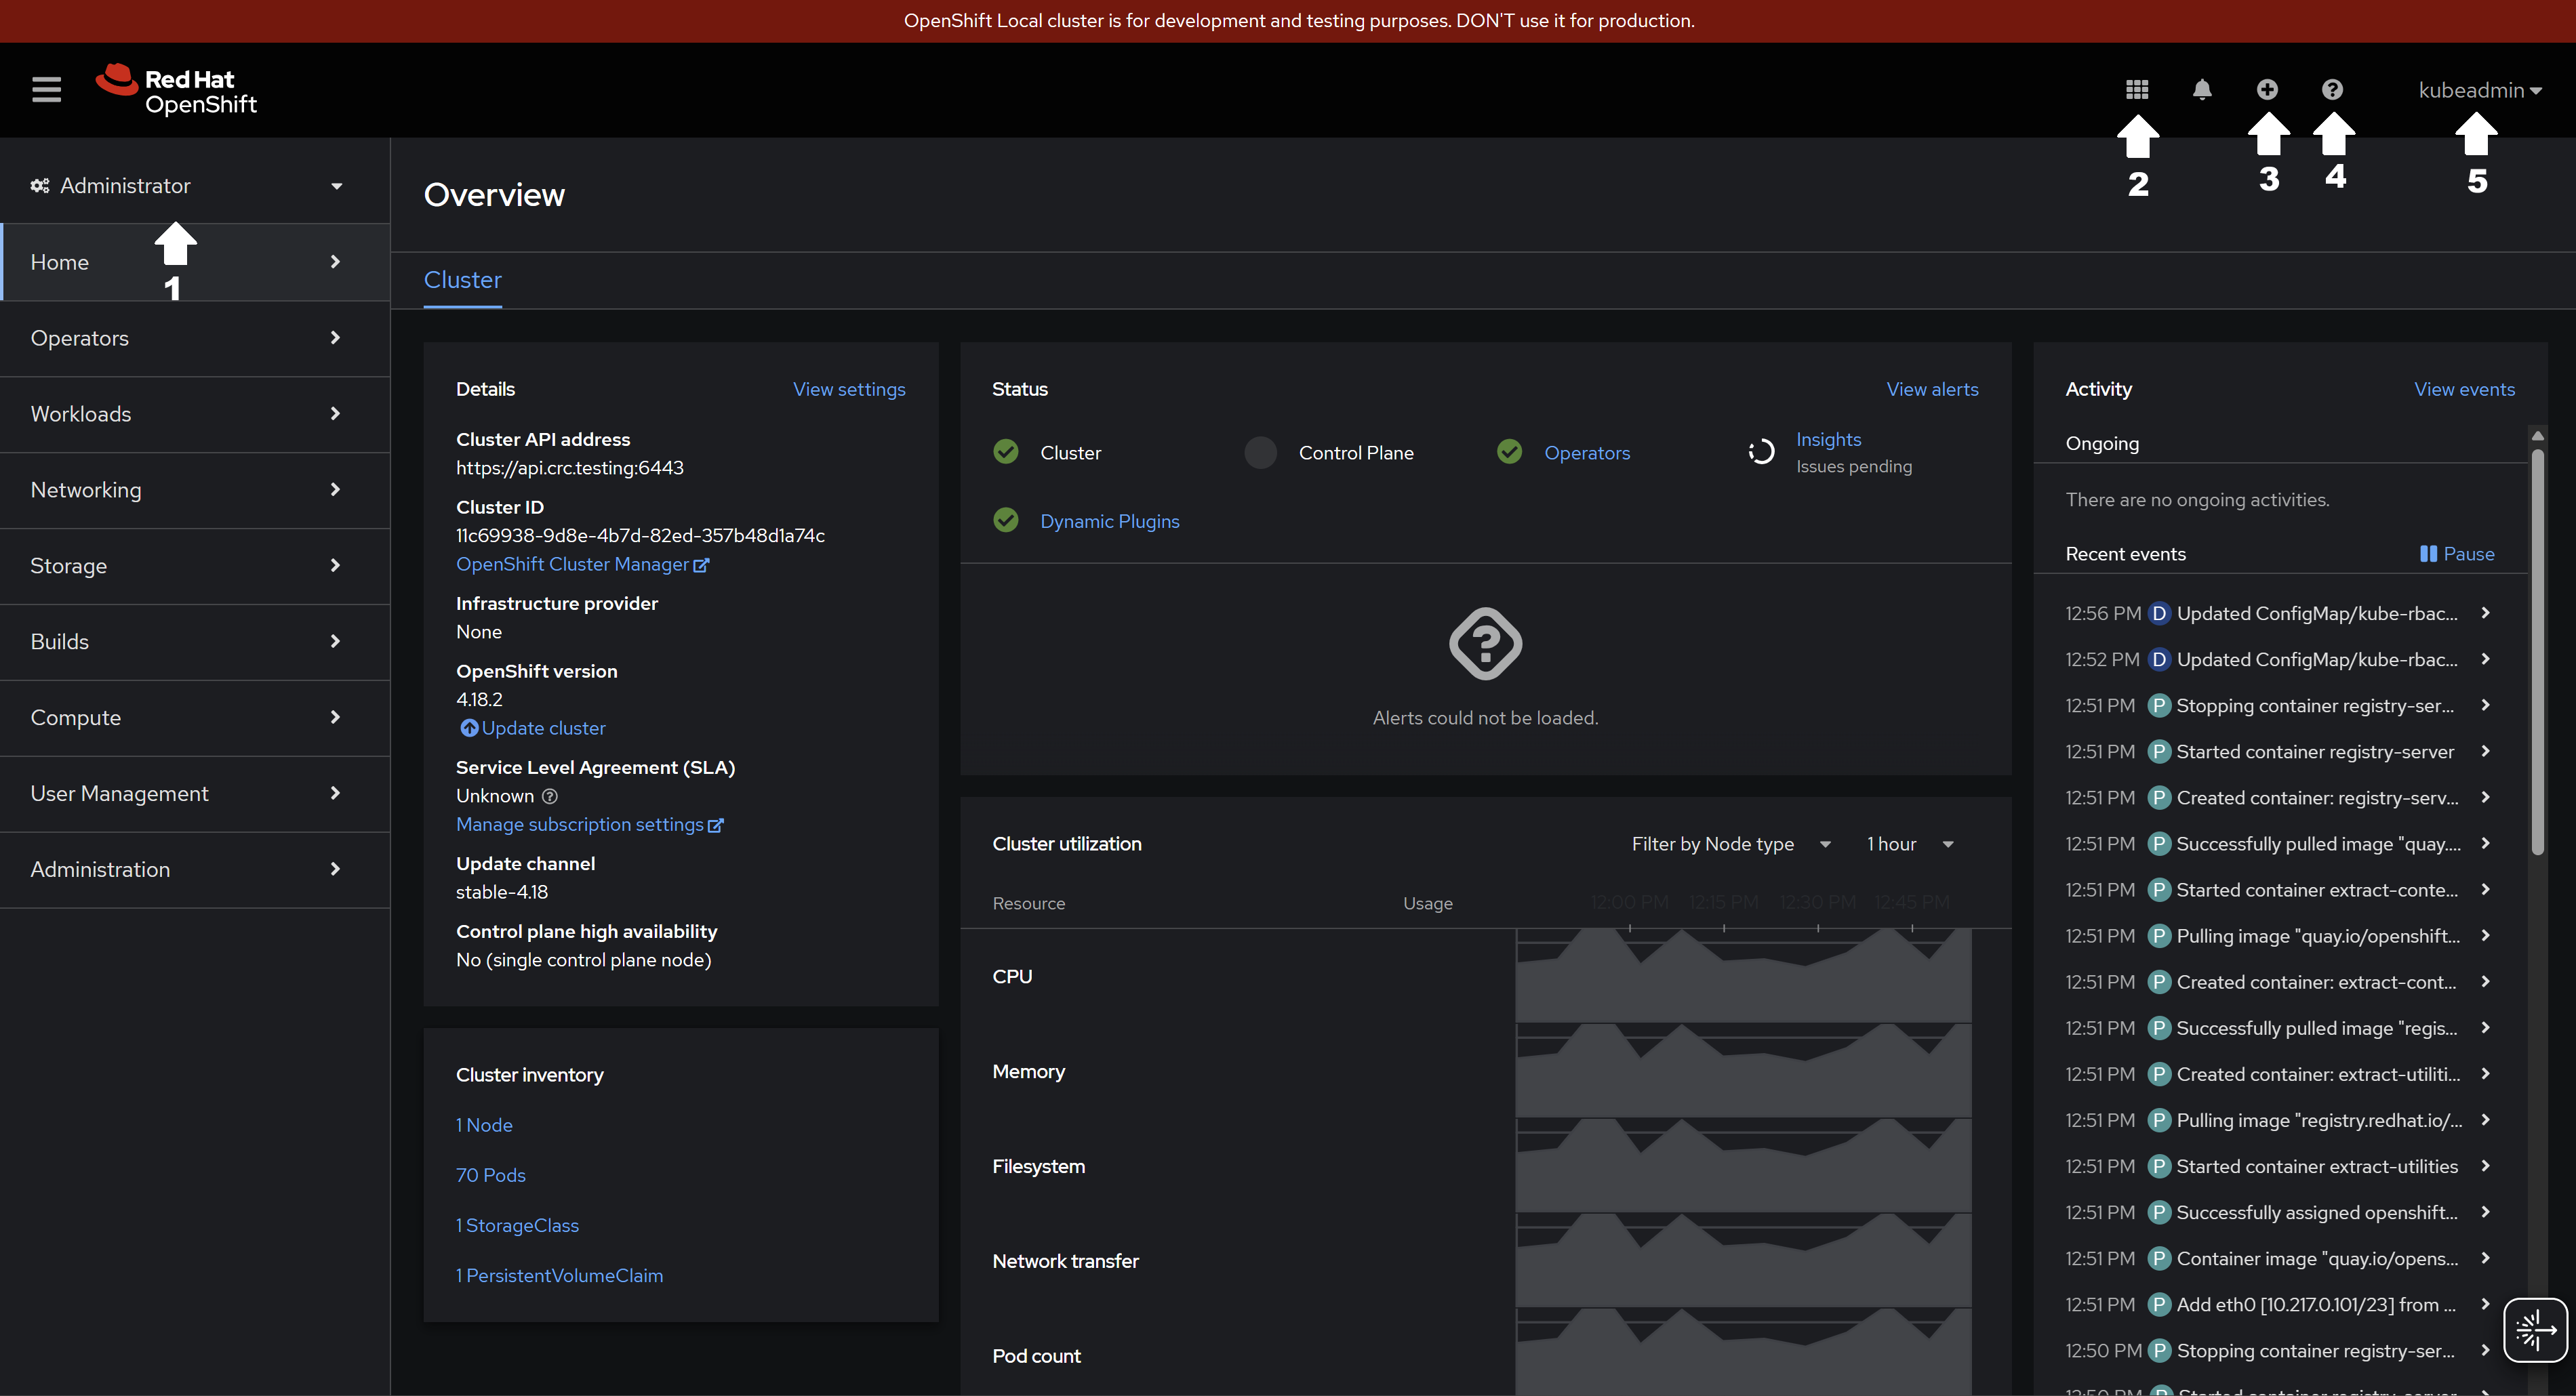
-
Role Dropdown: Navigate between Administration and Development -
Red Hat Applications Selector: Additional Red Hat applications such as Cluster Manager and Hybrid Cloud Console can be accessed here -
Quick Import Options: Quickly add new resources to OpenShift with yaml files, git repositories, or container images -
References and Artifacts: Links to CLI downloads, versioned documentation, and guided quickstart tutorials -
User Configuration: Manage the current user context and generate new time bound cli credentials
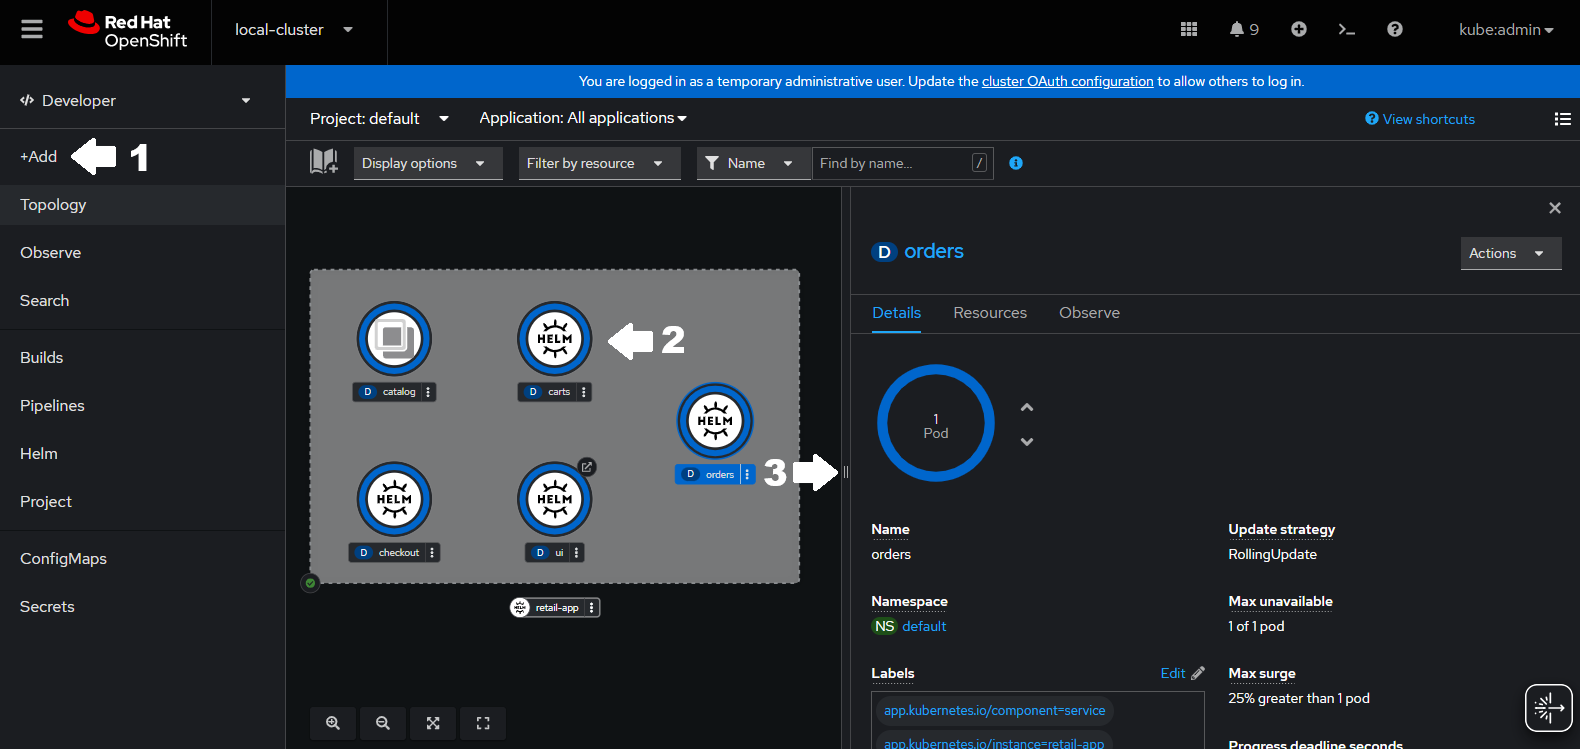
-
Quick Add: Add new applications from a variety of sources (containers, registries, templates, helm, object storage, etc) -
Topology View: View the relationship of applications within a project -
Application Panel: High level view of resource information including replicas, configuration, services, and routes
Command Line Client
Accessing resources from the cli is simpler, but less pleasant on the eyes. Locating and exploring resources will mostly involve one of the following two commands:
oc get "RESOURCE_TYPE" "RESOURCE_NAME" (-l|-o|-n|-A|...)
# -l: filter by labels
# -o: results format
# -n: scoped to a namespace
# -A: include all namespacesoc describe "RESOURCE_TYPE" "RESOURCE_NAME"Building Resources
Web Console
The console can be used to simplify the process of constructing resources for OpenShift.
As a gentle introduction, OpenShift provides forms for several resource types.

-
Populated Fields: Reduce the available field options to valid resources -
Freeform Field: Allow for generic string input (either required or optional) -
Increment with Units: Scalable numeric input with orders of magnitude -
Toggles/Checkboxes: Hide irrelevant config behind enabled/disabled markers -
Radio Selection: Select from a predefined static set
For more in depth customization there are several tools built into embedded resource editor
-
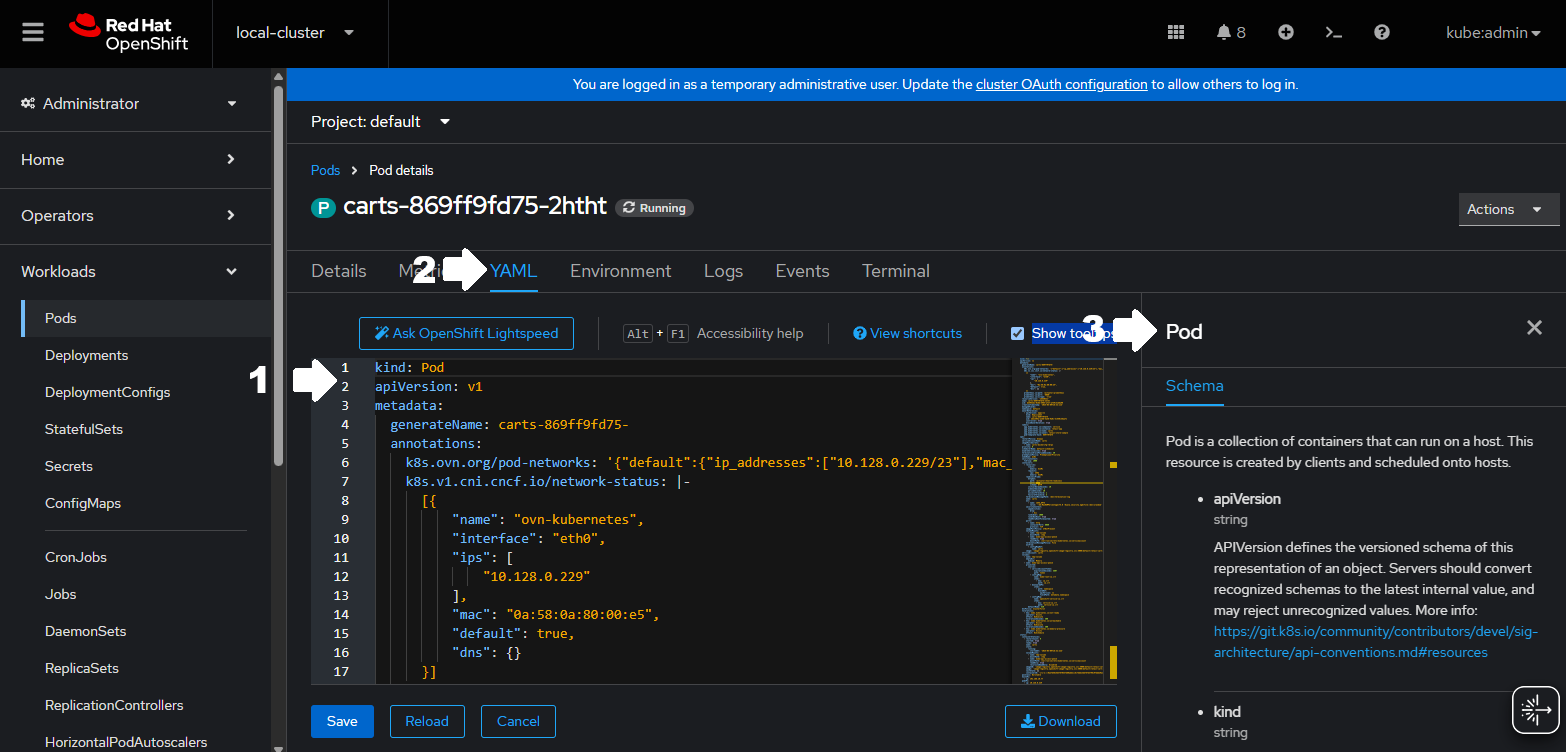
Editor: Modify yaml with schema assisted tab complete -
YAML: View and edit the stored configuration for this resource. (Available for all resources) -
Schema Sidebar: Explore the resource schema to identify available keys, values, and their associated types
Command Line Client
Unfortunately the cli does not provide as many user experience benefits. Creating and modifying resources is nearly identical to upstream Kubernetes in these are the most relevant commands:
oc create/apply -f {$FILENAME}oc edit "RESOURCE_TYPE" "RESOURCE_NAME"oc patch "RESOURCE_TYPE" "RESOURCE_NAME" (-p|--patch-file|--type|...)
# -p: apply an inline patch definition
# --patch-file: apply a patch defined in a file
# --type: leverage json, merge, or strategic patch strategiesContexts and Clusters
Our final concern involves operations across multiple tenants and multiple clusters. Any given OpenShift user could manage several applications across several projects that are deployed across several clusters.
Web Console
-
logging in/out to switch users
-
opening a browser or browser tab for each cluster’s independent console
-
leveraging the "Advanced Cluster Management" console plugin to manipulate resources across multiple clusters at once
|
|
Command Line Client
Unlike the console, the cli provides several user mechanisms to quickly switch between projects and clusters. In order to understand how the CLI provides this functionality, let’s breakdown the terms Context and Cluster.
Context is a combination of three things:-
User: Can be a service account or a user provided by an external identity provider
-
Namespace/Project: Interchangeable in this context
-
Cluster: An api endpoint in the form 'https://api."CLUSTER"."DOMAIN":6443'
apiVersion: v1
clusters:
- cluster:
    certificate-authority-data: # Redacted
    server: https://api.crc.testing:6443
  name: api-crc-testing:6443
contexts:
#### CONTEXT 1 #########################
- context:
    cluster: api-crc-testing:6443
    namespace: default
    user: kubeadmin/api-crc-testing:6443
  name: crc-admin
########################################
#### CONTEXT 2 #########################
- context:
    cluster: api-crc-testing:6443
    user: developer/api-crc-testing:6443
  name: crc-developer
########################################
current-context: crc-admin
kind: Config
preferences: {}
users:
- name: developer/api-crc-testing:6443
  user:
    token: sha256~6FxIo-2otdT1-GWq_3XeRxbYtmeN5LJRFeMILQkYfAs
- name: kubeadmin/api-crc-testing:6443
  user:
    token: sha256~LrlOU2OTEVZI7ln7Rh6ZrAvYXCpn8aowmSBmHmZAK_8
A user could manually modify this file to switch between any number of contexts, but there are much quicker ways provided by the cli.
oc config get-users ...
oc config get-contexts ...
oc config get-clusters ...oc config set-credentials ...
oc config set-contexts ...
oc config set-clusters ...oc config use-context "CONTEXT"|
There is an asymmetry between the "get" and "set" methods for users. |
Knowledge Check
How many separate methods exist in the Developer view’s "+Add" panel?
How many projects are in this cluster?
How many projects are "Default Projects"?
What are valid values for a Deployment’s "spec.strategy.type" field?
What command line interfaces are available besides oc from the local cluster?
Can you switch between two projects/contexts/clusters?